☠️ Manual for Work with Ammonia
Handling NH_3 and NH_3(aq) waste.
In case of emergency
- Stop any ongoing experiments with NH_3.
- Use the provided BASOSORB agent to neutralize the spilled liquid.
- Use the provided yellow rubber gloves, mops/sponges, and bucket to collect the liquid.
- Emergency services:
- 030 314 2 3333 or 112
- First-aiders:
- Delf Kober
- Andreas Strasser.
- Lab responsible:
- Peter Kraus: 030 314 77803
- Follow the relevant laboratory procedures described in Lab 10a: Alarm Systems.
- Note any incident in the Lab Log
- Inform Peter as well as Delf or Oliver or Kai.
1. Purpose
This document supplements the valid GBU Ebene 3: Gefahrstoffe and GBU Ebene 3: Gaswarnanlage by detailing instructions for:
- Routine work with ammonia (NH_3) gas in the lab.
- Use of the gas wash system.
- Disposal of acqueous ammonia solution (NH_3(aq) or NH_3OH) waste in the lab.
2. Risks
- Life-threatening / Toxic / Harmful substances when inhaled.
- Dangerous and corrosive substances in skin contact.
- Risk of cuts due to work with glass parts.
2.1 Gases
- 100% NH_3; toxic, flammable, provided from the external gas cabinet
- 1% NH_3; toxic, provided from the gas bottle cabinet
- compressed air, provided from the air manifold
2.2 Limits for work with NH3
The amount of NH3 that can be used in an experiment is limited by the capacity of the gas wash bottle. At a temperature of 20°C, NH3 solubility in water is > 500 g(NH3) per liter of water; at 30°C the solubility drops to ~ 400 g(NH3)/l(H2O).
To maintain safe operation, concentration of NH3 in the wash bottle must not exceed 200 g(NH3)/l(H2O).
As the gas is sparged through the wash bottle with additional 5 l/min of air, the water will evaporate from the wash bottle as a function of time. The water evaporation rate due to air flow (5 l/min) in wash bottle has been determined to be 115 ml water/day.
A 2.5 l wash bottle filled with 2.2 l of water and purged with 5 l/min of air was confirmed to effectively remove all detectable NH3 from a flow of 20 ml/min of 100% NH3. This vented gas is further diluted by a factor of 1:1000 into the 270 m³/h lab vent system.
To maintain safe operation, the air flow in the purge stream must be above 5 l/min at all times.
A flow rate of 20 ml/min of 100% NH3 corresponds to 20 g(NH3)/day. Flows at lower concentrations (10% or 1% of NH3) or higher flow rates (up to 100 ml/min) have to be scaled accordingly.
Given the above considerations, taking into account evaporation, common scenarios that are allowed for use are listed below:
| Flow rate | Concentration | Wash bottle | Maximum time |
|---|---|---|---|
| 20 ml/min | 100% NH3 | 2.2 l (in 2.5 l) | 240 hours |
| 20 ml/min | 100% NH3 | 0.8 l (in 1.0 l) | 72 hours |
| 100 ml/min | 100% NH3 | 2.2 l (in 2.5 l) | 72 hours |
| 100 ml/min | 100% NH3 | 0.8 l (in 1.0 l) | not allowed |
| 100 ml/min | 10% NH3 | 0.8 l (in 1.0 l) | 96 hours |
| 100 ml/min | 1% NH3 | 0.8 l (in 1.0 l) | 120 hours |
For work with larger volumes or amounts of NH3, discuss the experiment with Peter.
3. Operating manual
- Always use mobile gas sensors when working with NH3.
- Always ensure the gas wash bottle is attached when working with NH3.
- Always ensure there are no open connections in the gas path of NH3 before starting work.
3.1 Installing gas wash (Drechsel) bottle
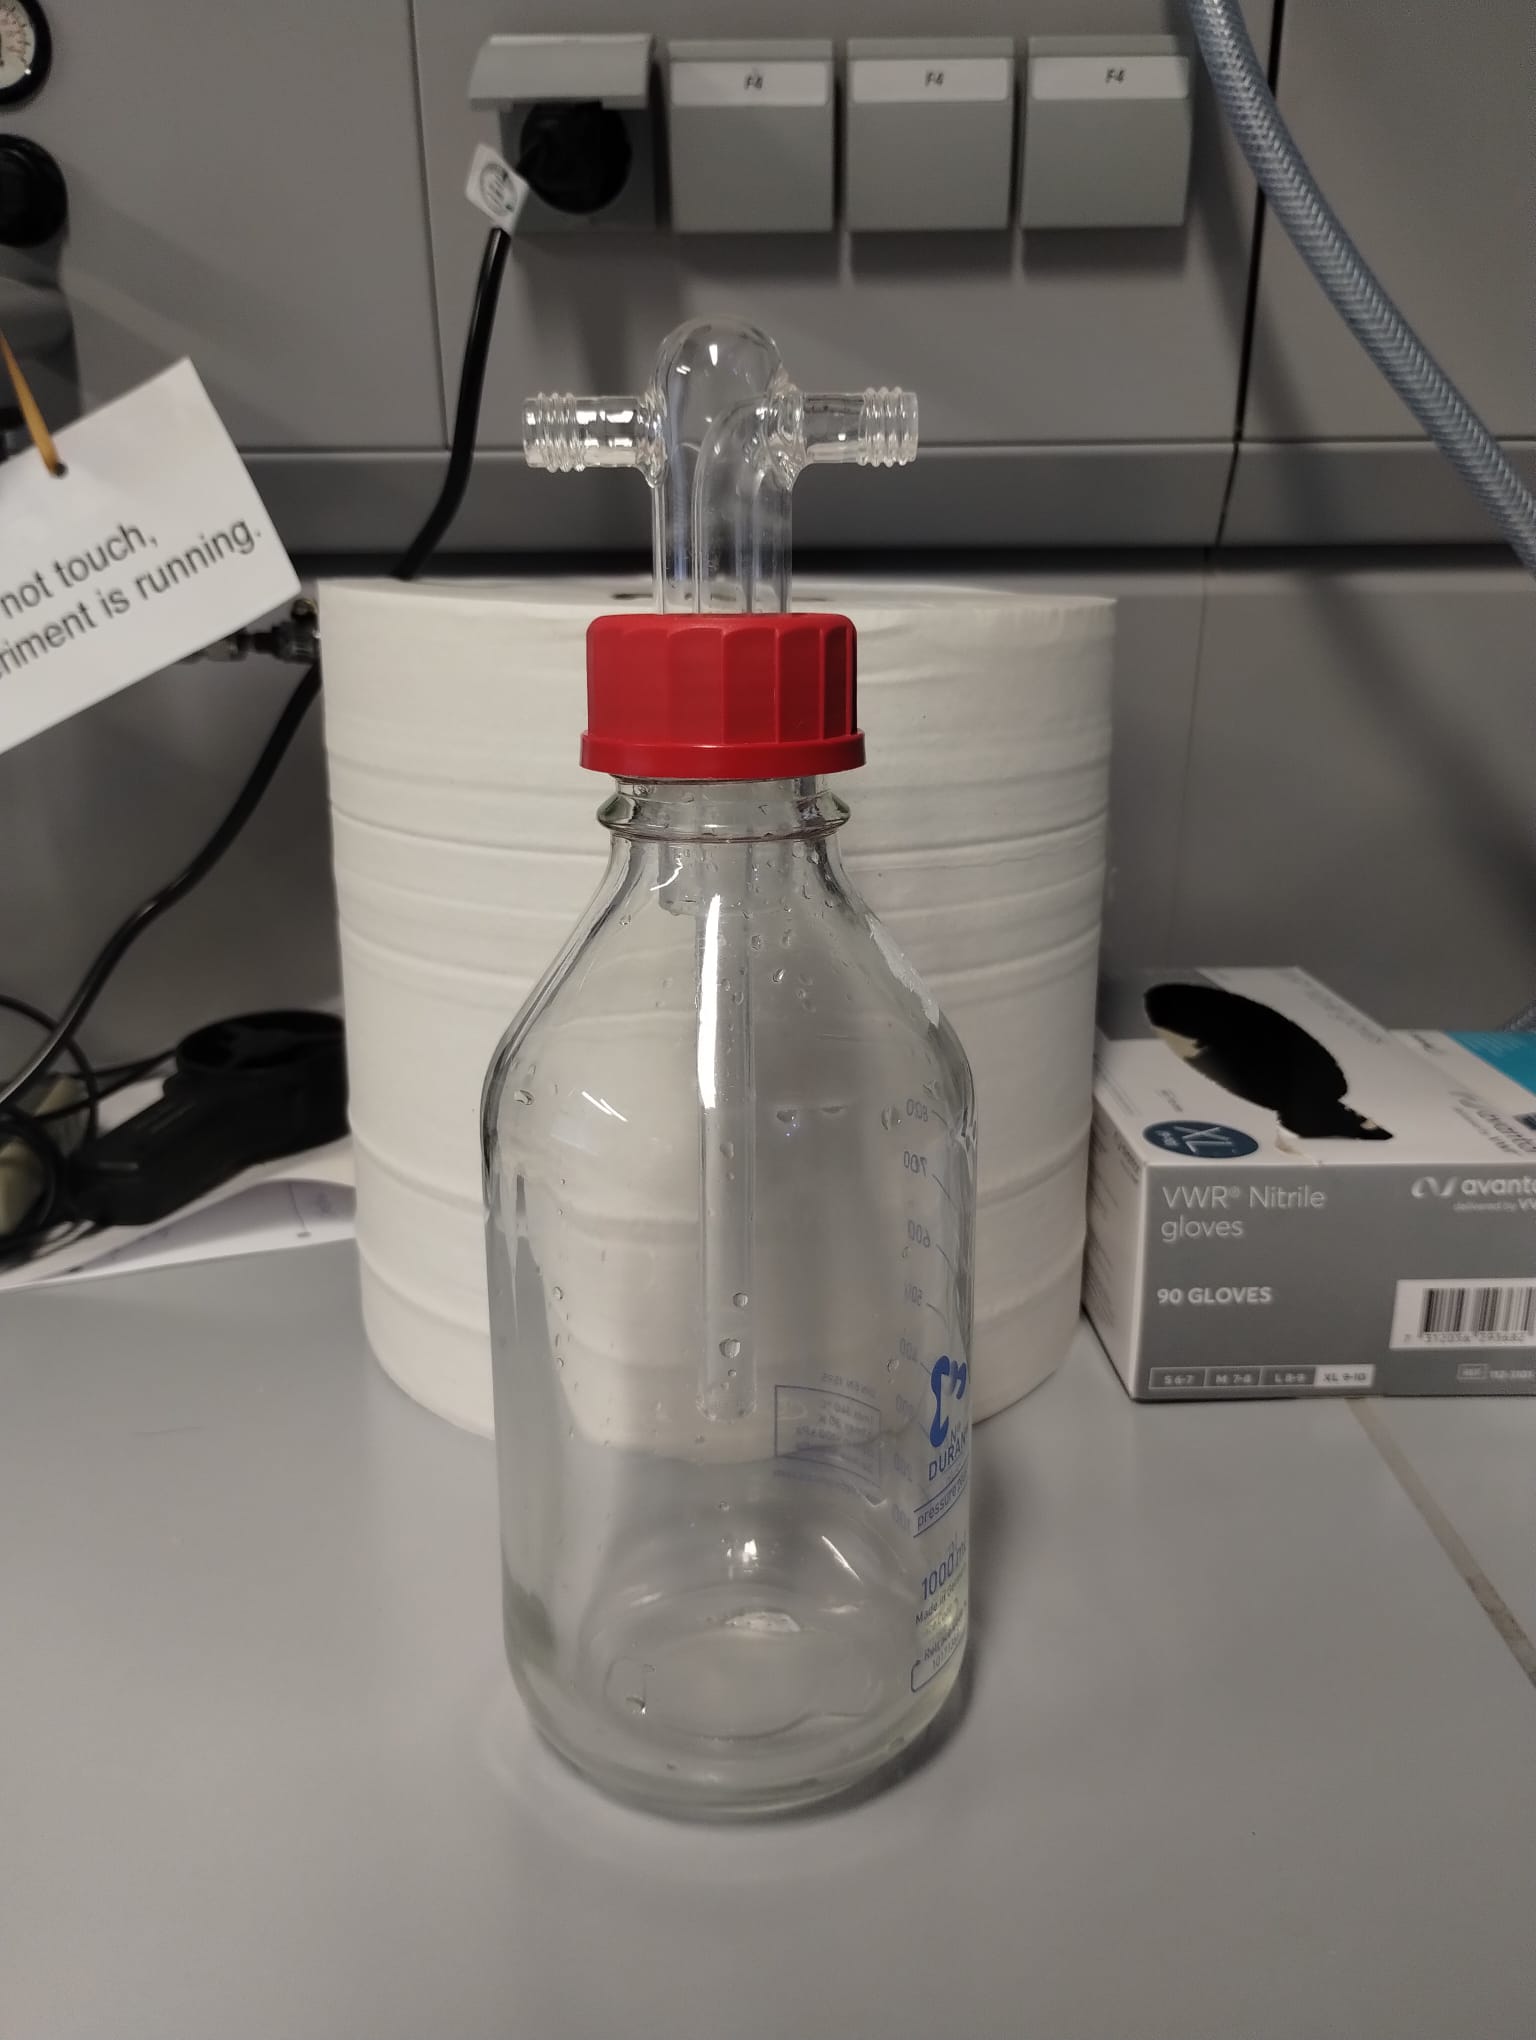
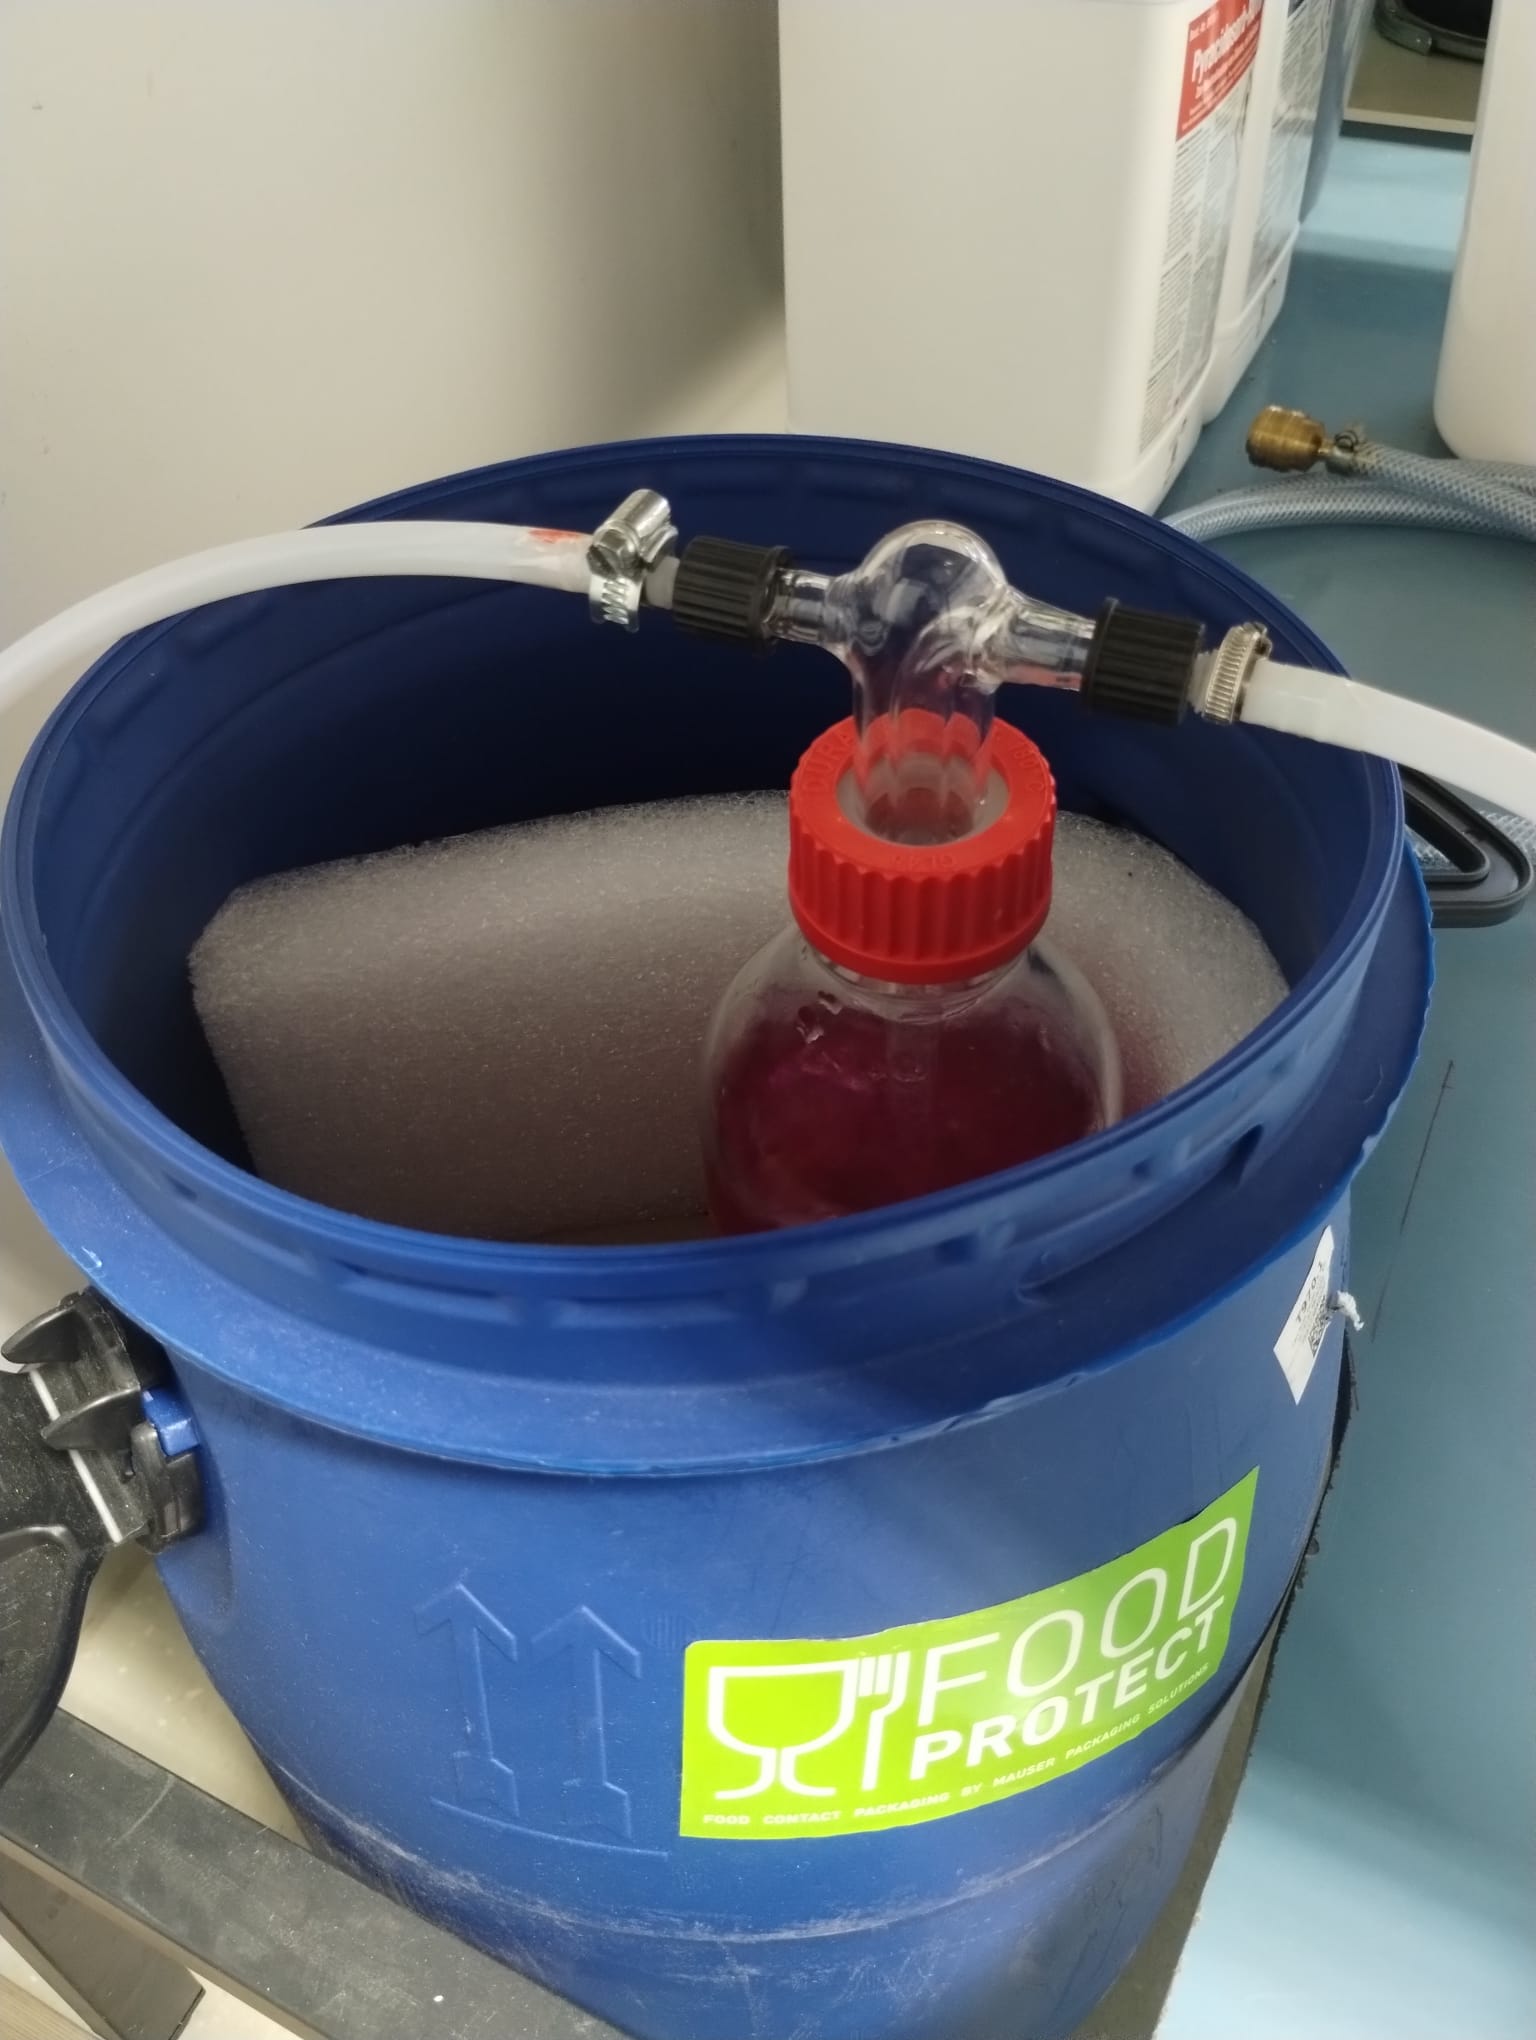
Material required:
- Glass Drechsel bottle (see Figure 1) or a 2.5 l plastic wash bottle
- Gas wash fitting (see Figure 1) of appropriate length
- Gloves
- Phenolphthalein
- Pipette
Instructions:
- Add 800 ml of deionized water into the 1 l glass Drechsel bottle. Alternatively, add 2.0 l of deionized water into the 2.5 l plastic wash bottle.
- Add approx. 1 ml of Phenolphthalein using a plastic pipette.
- Close the wash bottle using an appropriate gas wash fitting and swirl it gently to homogenize the solution.
- Adjust the fitting. The tube of the gas wash fitting should reach close to the bottom of the bottle to ensure the gas is getting properly sparged.
- Connect the setup outlet to the gas inlet of the bottle marked with the green label. See Figure 2.
- Connect the bottle outlet to the vent pipe marked with the red label.
- Then place the bottle inside the blue bucket.
Do not confuse the gas inlet and outlet of the bottle! This can cause pressure to build up in the bottle and break the bottle!
3.2 Setting up the gas wash system
- Ensure the NH3 wash bottle is connected, filled, and placed in secondary containment (see Figure 2).
- Ensure the gas wash inlet is connected to the flow meter and compressed air manifold at position 1.
- Open the compressed air (outlet 1). The air should now be bubbling through the gas wash bottle.
- The flow meter for the compressed air should be set to at least 5 l/min. This is necessary to sufficiently dilute the purged gas.
- Ensure the outlet of the gas wash bottle is connected to an appropriate vent line.
3.3 Check that gas lines are ready for ammonia
Check that all connections are secure in the whole path of NH3 through the lab:
An appropriate steel (flexible) hose is attached between NH3 supply point (pressure reducer) and the instrument.
The connections within the instrument(s) are secure.
Gas is routed appropriately towards the gas wash bottle with no open connection along the flow path.
NoteIf you are using the GC, check that all sampling ports on the multiport valve are connected or plugged.
The instrument outlet is attached into the gas wash line.
You may now proceed with work with NH3 by opening the gas cabinet shut-off.
3.4 End of work with ammonia
You should always purge the instruments with inert gas (Ar or N2) after completing the work, see:
3.5 Disposal of ammonia solution
Only proceed with these instructions after the gas flow path has been sufficiently purged with inert gas and all NH3 inlets (MFCs) have been closed. In general, this should be at least 5 minutes after the end of work with NH3.
Close the compressed air manifold, stopping the supply of purge air into the bottle. This is mainly to avoid splashing the ammonia solution out of the container.
Disconnect the NH3 wash bottle outlet and check the NH3 concentration using the mobile NH3 sensor.
NoteIn case an alarm is triggered, reconnect the outlet, switch the inlet air on, and purge with air for a few more minutes. Note the incident in the lab log, including experimental conditions etc., so that it can be avoided in the future.
If no alarm is triggered, disconnect the gas inlet to the gas wash bottle.
Neutralize the solution using diluted hydrochloric acid until the pink solution becomes completely colourless.
NoteIn this reaction, the basic NH3(aq) (or NH4OH) reacts with the acidic HCl, forming water and NH4Cl. This NH4Cl is a white powder, which may precipitate out of the solution (solubility limit is 380 g(NH4Cl)/l(H2O) at 25°C). In case a significant amount of solid NH4Cl is formed (> 10 g), contact Peter or Delf prior to disposal.
Dispose of the neutralized solution in the sink in the Lab 10C, flushing and rinsing together with water, and place all components back in their original positions.
TipIf the wash bottle will not be immediately used again, rinse it with ethanol or isopropanol in order to avoid lime formation during storage.