🗄️ Manual for External Cabinet Operation
Outside gas cabinet for NH_3 storage
In case of emergency
- Emergency services:
- 030 314 2 3333 or 112
- First-aiders:
- Delf Kober
- Andreas Strasser.
- Lab responsible:
- Peter Kraus: 030 314 77803
- Stay upwind from the leak.
- Warn bystanders and clear the area.
- Contact the responsible person.
- Follow the relevant laboratory procedures described in Lab 10a: Alarm Systems.
- Inform Peter as well as Delf or Oliver or Kai.
1. Purpose
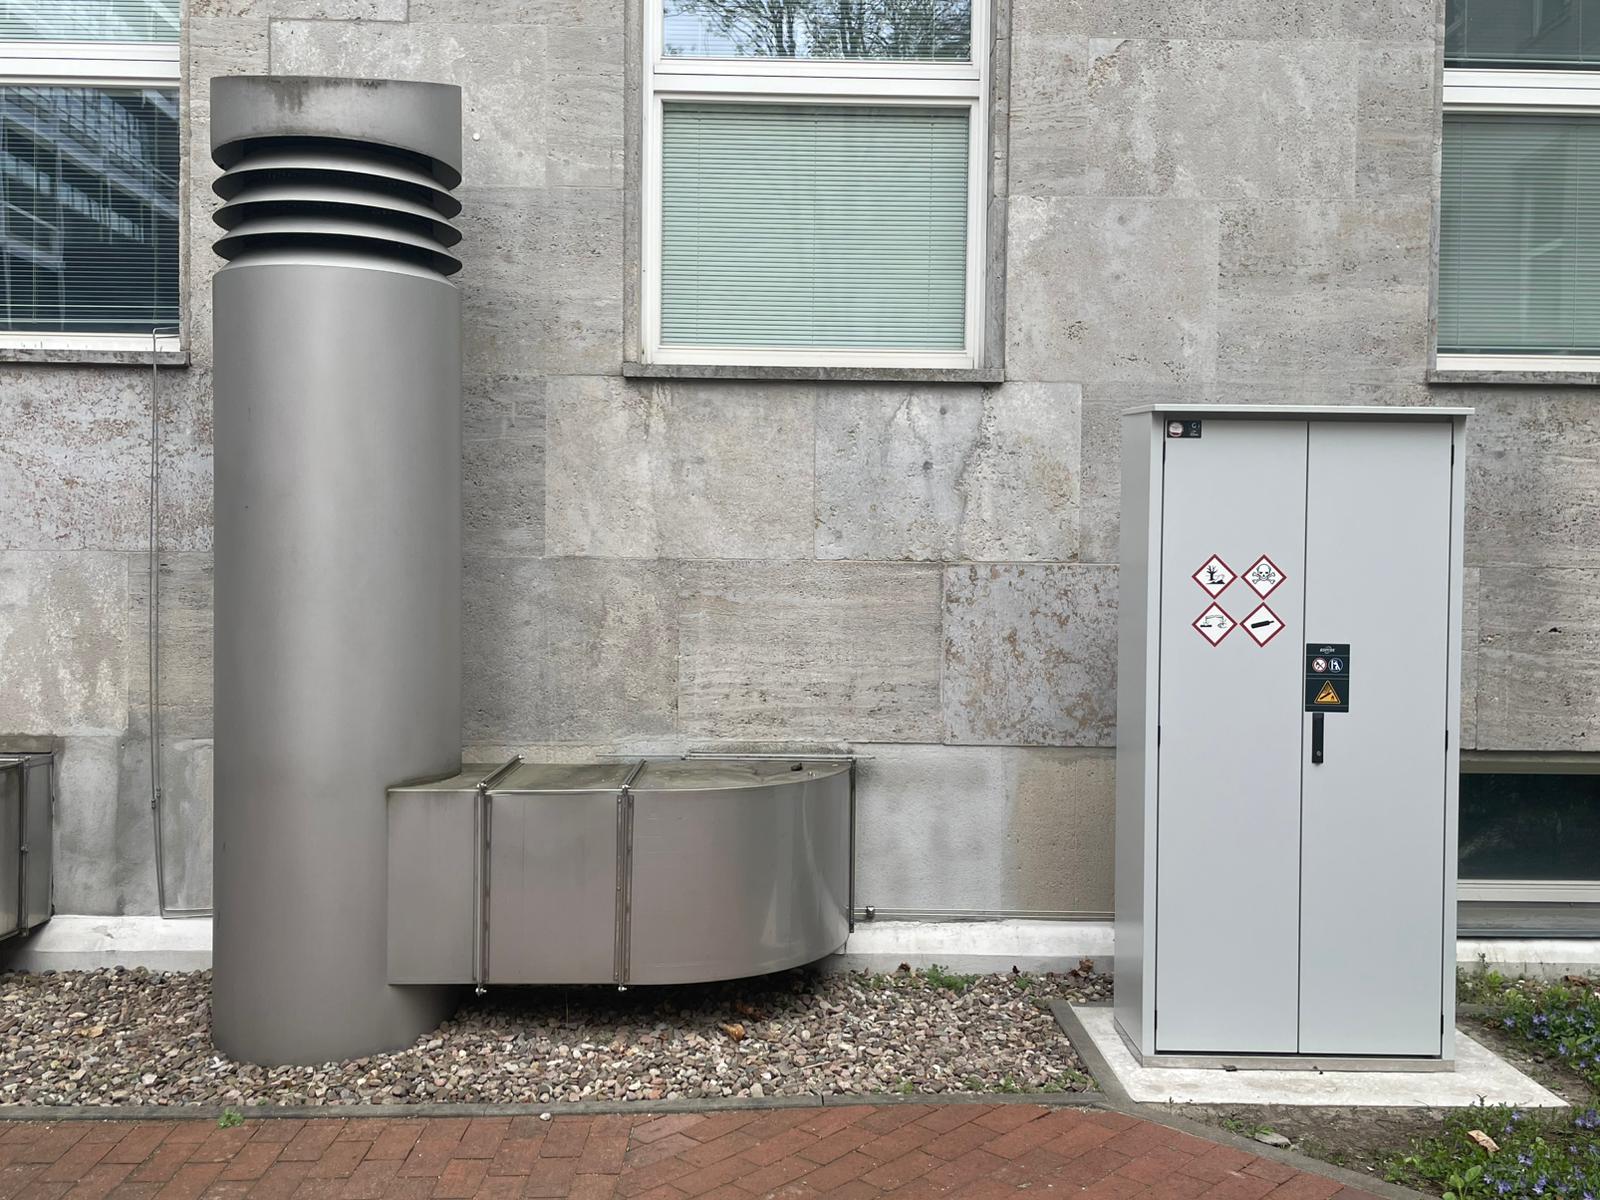
This document supplements the valid BA: Externer Gaslager by detailing instructions for:
- Routine work with the external gas bottle cabinet behind building BA3 (Figure 1).
- Installation and removal of bottles from the external gas bottle cabinet.
- Safe work with ammonia (NH_3) bottles.
2. Risks
- Life-threatening / Toxic / Harmful substances when inhaled
- Danger of fire due to highly flammable gas
- Risk of injury during mechanical work during cylinder transport and installation
- Risk of asphyxiation due to lack of oxygen
- Risk of injury due to gas escaping under high pressure
- Risk of to cold burns due to expanding gases
- Risk of explosions due to heat or fire
2.1 Gases
The following 50 l gas cylinders are installed in the external gas cabinet:
- Argon; used as purge gas
- 100% NH_3; toxic, flammable
3. Operating manual
- Always use mobile gas sensors when working with NH_3
- When changing bottles:
- An accompanying person must always be present.
- Always check the valves of filled and empty gas bottles for leaks.
Operation of connected bottles
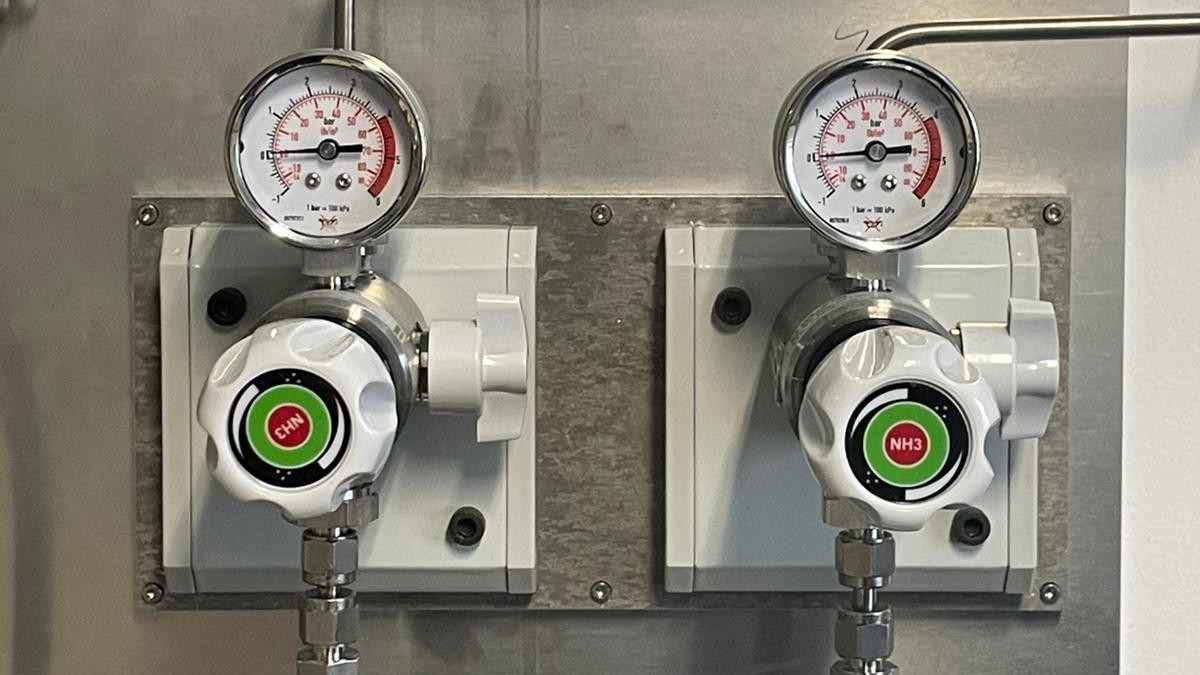
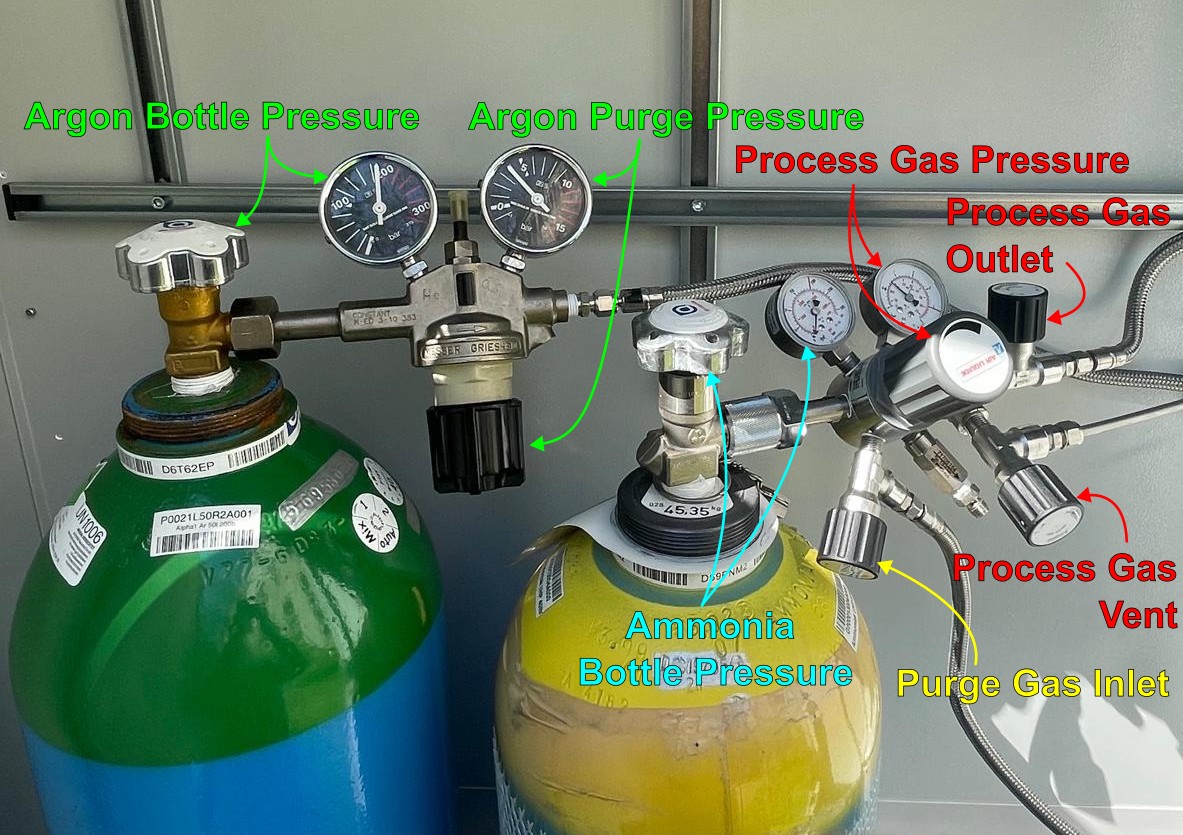
The gases supplied from the external gas cabinet are available in the lab using the two pressure reducers (Figure 2) mounted on the wall in the lab:
- Always assume that these lines are pressurised with toxic gas.
- Never open the wingnut valves without an appropriate vent line attached.
- Close the wingnut valve on the pressure reducer on the wall at the end of every experiment.
- If you need to disconnect any line attached to the pressure reducers (Figure 2):
- Vent it into an appropriate vent.
- Purge it with an inert gas (Argon or N_2).
Removal of NH_3 bottles
- Familiarise yourself with the
🧴 Manual Gas Bottles. - Follow these steps:
- Ensure the wingnut valve on the pressure reducer on the wall is closed.
- Attach the pressure reducer on the wall (Figure 2) into a suitable vent.
- Close the ammonia gas bottle inside the external cabinet (Figure 1).
- Ensure the argon purge pressure is higher than the process gas pressure, at most 4 bar.
- Close the process gas outlet (see Figure 3).
- Open the process gas vent. This will vent any ammonia overpressure in the pressure reducer using the vent behind the gas cabinet.
- Open the purge gas inlet (see Figure 3). This will wash the remaining ammonia out of the pressure reducer.
- Close the process gas vent.
- Close the purge gas inlet.
- Disconnect the bottle. Attach bottle cap. Remove the bottle.
- Ensure the old bottle is marked as
disposedof in the datalab inventory.
Note that the process gas outlet line has not been purged and still contains NH_3. If you need to disassemble the piping between the cabinet and the lab, you need to purge the process gas outlet line all the way through the pressure reducers (Figure 2) connected to a suitable vent line between steps 8 and 9 of the above.
Replacement of Argon bottles
Replace the Argon bottle once pressure drops below 20 bar. Use of the external gas cabinet without a purge gas bottle (Argon) with sufficient pressure is not allowed.
- Familiarise yourself with the
🧴 Manual Gas Bottles. - Follow these steps:
- Close the argon bottle.
- Close the argon purge pressure reducer (see Figure 3).
- Ensure the purge gas inlet (see Figure 3) is closed.
- Disconnect the flexible hose connecting the two pressure reducers.
- Vent the argon pressure reducer by opening and closing it.
- Disconnect the bottle. Attach bottle cap. Remove the bottle.
- Install a new bottle. Connect the pressure reducer.
- Reconnect the flexible hose connecting the argon purge pressure reducer to the purge gas inlet. Ensure the pressure reducer is fully closed.
- Open the argon bottle.
- Open the argon purge pressure reducer, set pressure of at most 4 bar.
- Ensure the old bottle is marked as
disposedof and the new bottle is available in the datalab inventory.
Installation of new NH_3 bottles.
Use the above procedure to remove the NH_3 bottle safely.
- Familiarise yourself with the
🧴 Manual Gas Bottles. - Follow these steps:
- Do not open bottle until instructed to do so.
- Close all four valves on the ammonia pressure reducer in the gas cabinet (Figure 3).
- Insert and secure the bottle. Remove bottle cap and attach the pressure reducer. Do not open bottle.
- Open purge gas inlet (see Figure 3). This will pressurise the pressure reducer using argon.
- Set appropriate process gas pressure (see Figure 3). Recommended pressure is 2.8 bar.
- Open process gas vent (see Figure 3). This will purge the pressure reducer using argon.
- Close the process gas vent.
- Open the ammonia bottle.
- Ensure the pressure reducer in the lab (Figure 2) and/or the solenoid is closed. Open the service gas outlet.
- The process gas outlet line may have to be flushed again as the pressure reducer contains purge gas.
- Make a note of the installation in the Lab Log.
- Ensure the new bottle is also present in the datalab inventory.