⚗️ Manual for using COCoS
Cavity Operando Conductivity Set-up
In case of emergency
In case of a toxic gas leak
In case of uncontrolled heating
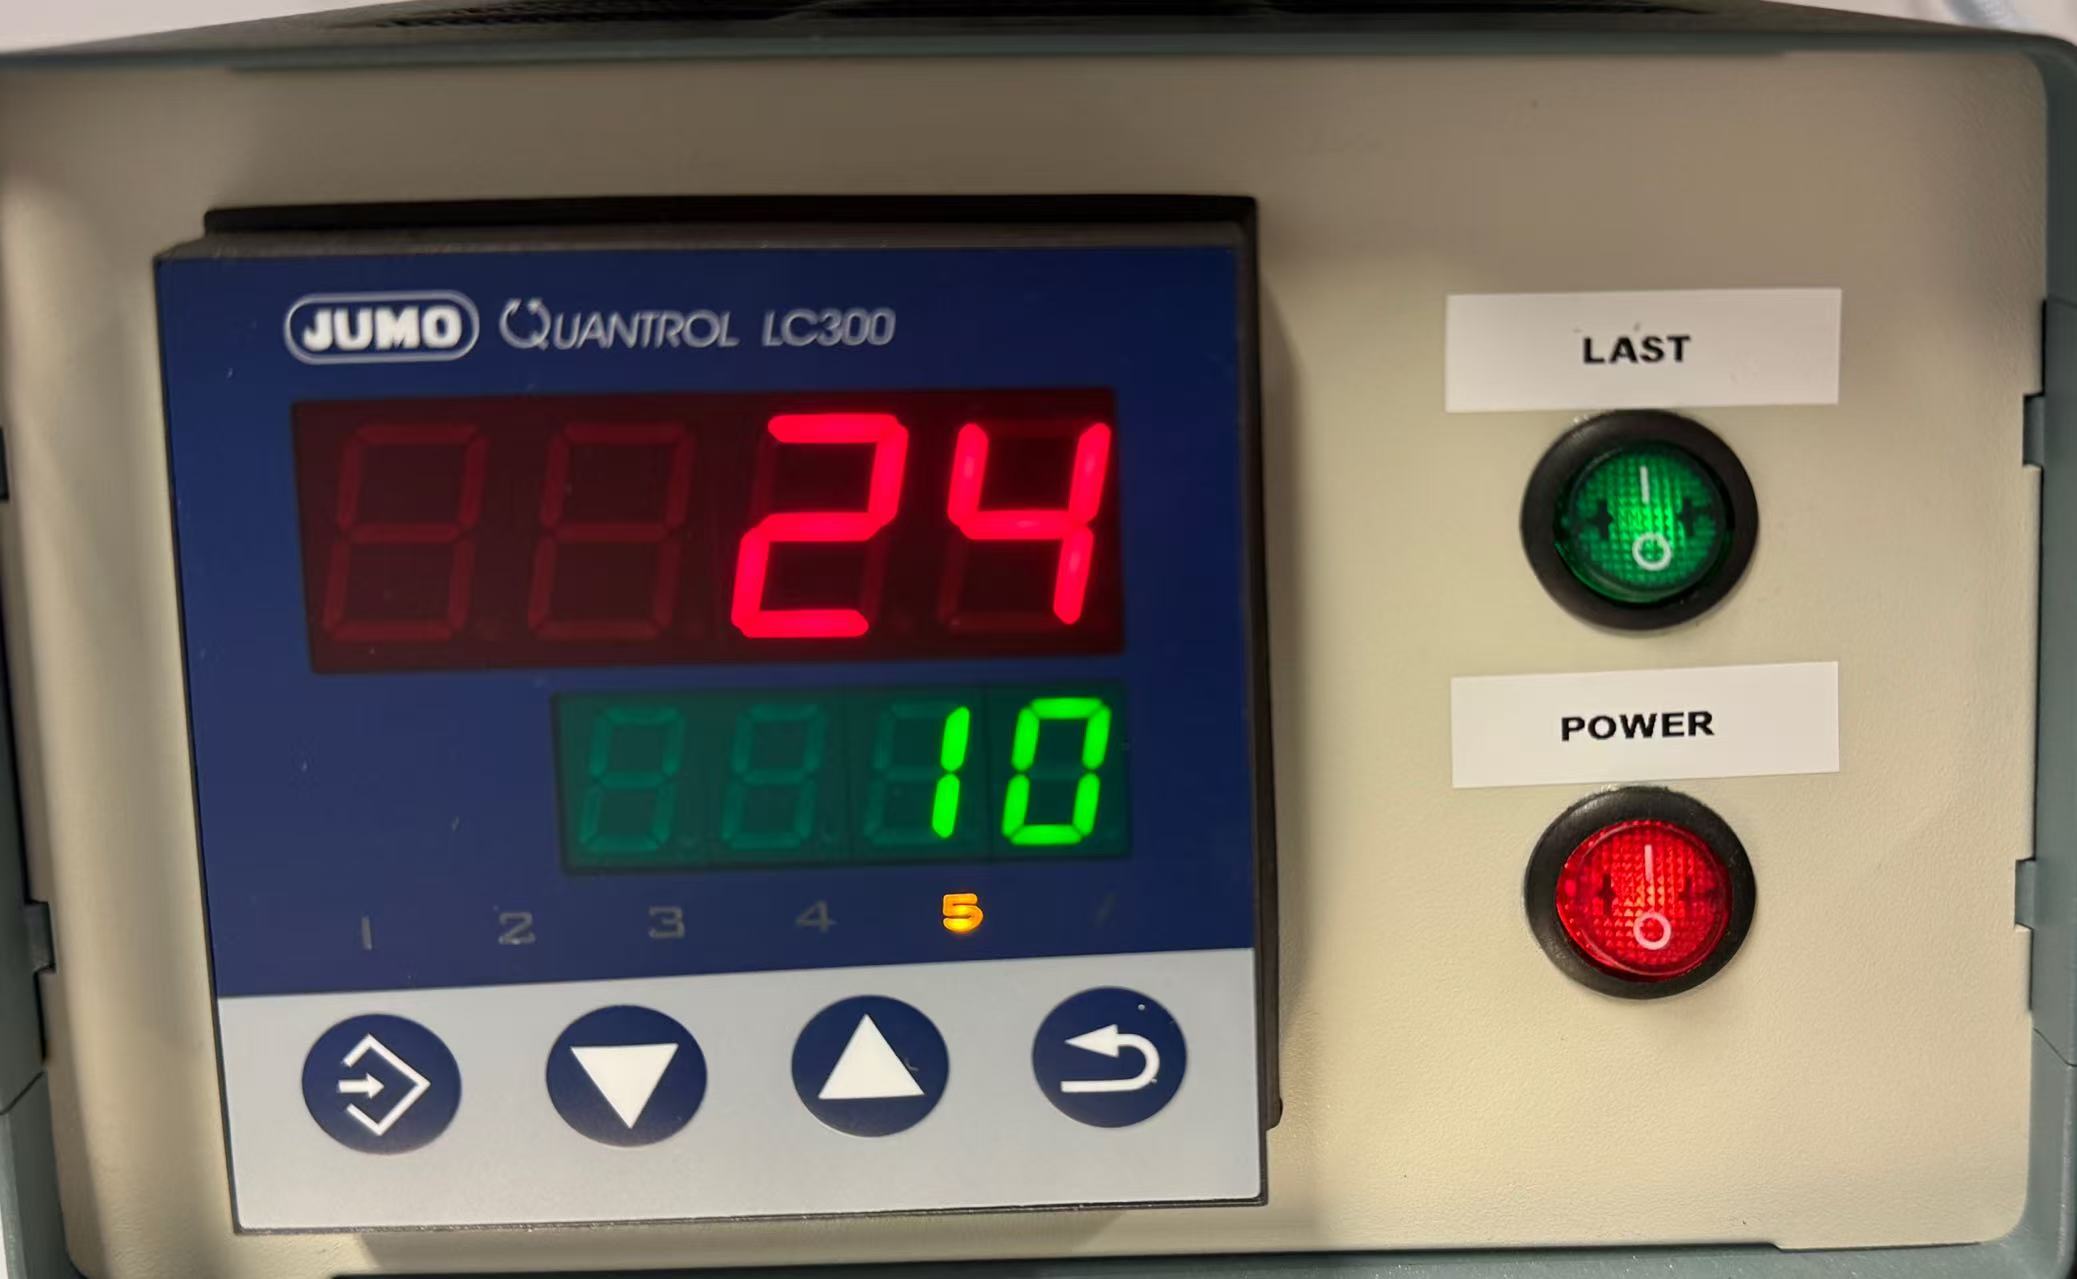
- Immediately switch off the heater using the red and green power buttons on the heater controller (see Figure 1).
- If safe and possible, switch off supply of any flammable gases.
Once safe
- Follow the relevant laboratory procedures described in Lab 10a: Alarm Systems.
- Inform Peter as well as Delf or Oliver or Kai.
1. Purpose
This manual describes the safe operation of the Cavity Operando Conductivity Set-up (COCoS) used for contactless dielectric and conductivity measurements of solid catalyst samples under controlled gas atmosphere and temperature.
2. Requirements (Gases, Equipment and Software)
2.1 Gas Supply
The following gases are permitted for use:
- Nitrogen (N₂) – asphyxiating gas
- Oxygen (O₂)
- Synthetic air (20% O2 in N2)
- Carbon dioxide (CO2) – asphyxiating gas
- Argon (Ar) – asphyxiating gas
- Hydrogen (10% H₂ in N2) – flammable gas!
- Methane (20% CH₄ in N2) – flammable gas!
- Ethane (20% C₂H₆ in N2) – flammable gas!
- Propane (20% C₃H₈ in N2) – flammable gas!
- A compressed air system (only use for heating)
2.2 Equipment
- Microwave resonant cavity (Aluminum)
- Vector Network Analyzer (PicoVNA)
- Temperature controller and heater (JUMO)
- Quartz reactor tube with quartz wool
- Mass flow controllers (Gas mixing station with Alicat MFCs and Bronkhorst mixing unit)
- MCC unit for thermocouple measurements
2.3 Safety & Analytical Devices
- Safety goggles
- Gloves
2.4 Necessary software
For testing / device setup
- Bronkhorst software
- Alicat software
- DAQami software
- PicoVNA 3 / PicoVNA 5
For normal operation
- Python
- tomato
- tomato-bronkhorst
- tomato-jumo
- tomato-mcc
- tomato-picovna
- tomato-alicat
3. Operating manual
3.1 Pre-operation Checks
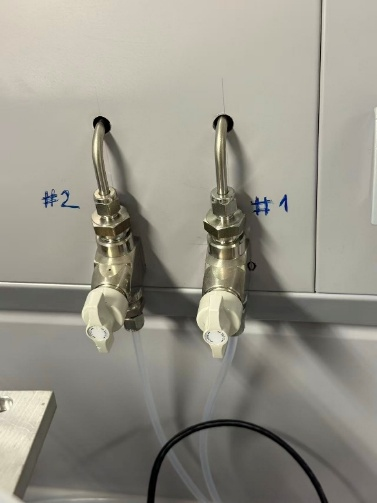
- Gas connections: Check that the gas lines from the main gas panel are connected to gas lines #1 and #2 (see Figure 2). Ensure that the gas supply is connected first to the Bronkhorst mixing station and then to the Alicat MFCs.
- Reactor tube: Check that the reactor tube is intact, clean, and free of any unknown sample residues.
- Cavity closure: Check that the top cover screws and bottom fixing screws of the cavity are tightened securely.
- Exhaust system: Check that the lab air exchange system is running and that the Swagelok connection at the outlet of the reactor tube is connected to the exhaust line.
3.2 System Preparation
- Restart all machines and the laptop.
- Perform a blank measurement with the empty reactor tube in place (without sample) to record the baseline response of the cavity.
- Check that the following pipelines and devices are connected:
- Compressed air is supplied via the left supply ball valve in the compressed air line, see the compressed air system.
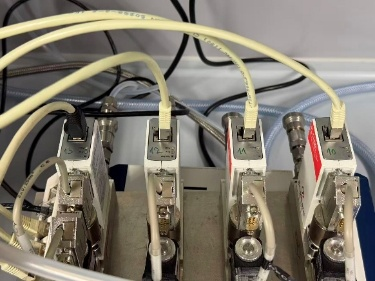
- Verify that the gas mixing station is correctly connected and configured (see Figure 3).
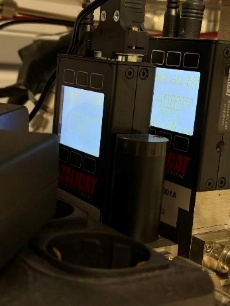
- Verify that the COCoS gas supply station is set to 1750 mbar and 5 mL/min (see Figure 4)
- Check that the following devices are connected and recognized by tomato:
- Bronkhorst
- VNA
- JUMO heater
- MCC
3.3 Sample Loading
Warning
When handling powder samples, follow the safety measures specified in GBU Ebene 3 Gefahrstoffe.
- Clean all tools before handling samples.
- Clean the reactor tube.
- Weigh the empty reactor tube.
- Add one layer of quartz wool (approx. 10 mm height, ~30 mg) and weigh the reactor tube again.
- Add one layer of sample (approx. 10 mm height) and weigh the reactor tube again.
- Add a top layer of quartz wool (approx. 10 mm height, ~30 mg) and weigh the reactor tube again.
- Clean all tools after handling samples.
Note
If required, powder samples should be pelletized and then sieved to a defined particle size fraction before loading.
3.4 VNA Calibration
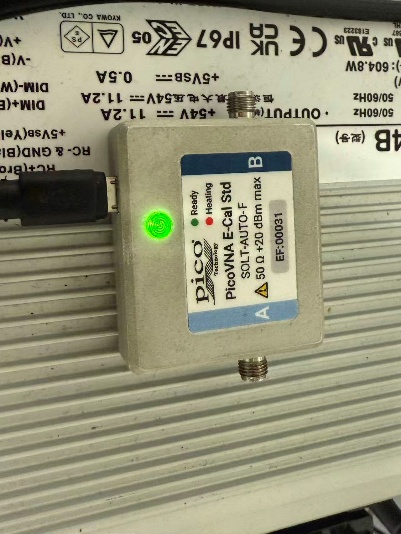
- Connect the electronic calibration (E-Cal) module to the computer via USB (see Figure 5).
- Wait until the E-Cal module is fully warmed up. The indicator light changes from red to green.
- Connect port A of the E-Cal module to Port 1 of the PicoVNA using the coaxial cable system (S11 reflection mode).
- Ensure that the E-Cal module is positioned at the same height and in the same physical configuration as the microwave cavity.
- Open the PicoVNA 3 software.
- Select Calibration Kit → Electronic Cal Kit.
- Choose the first connection option (A port of the E-Cal module connected to Port 1 of the PicoVNA).
- Click Find and load EasyCal data, then click Apply.
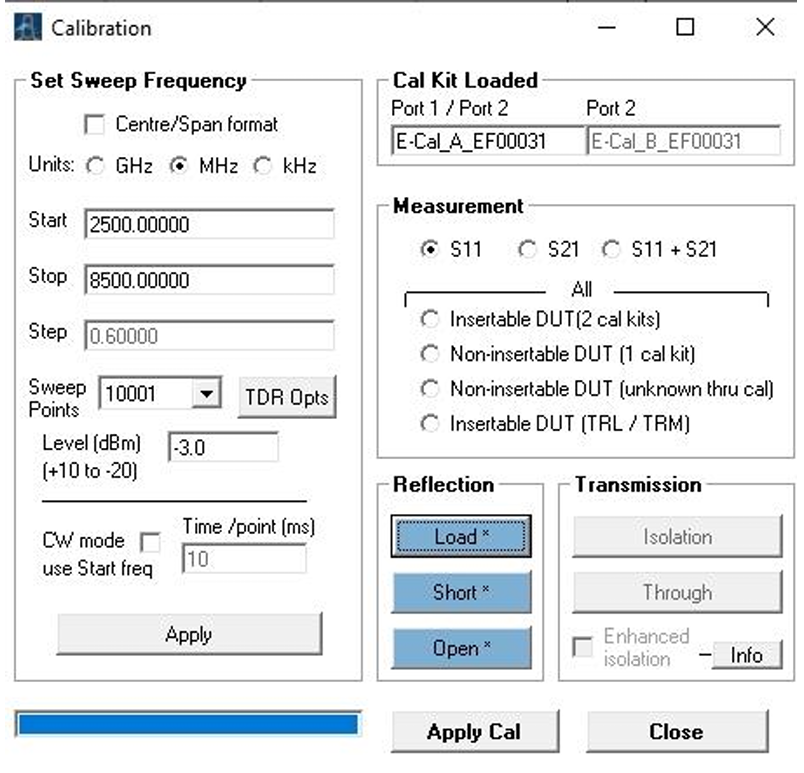
- Set the calibration scan parameters as shown in Figure 6.
- Start the calibration scan and click Apply Cal.
- Verify that the calibration result is correct; the calibration trace should appear as a straight line.
- Remove the calibration module and reconnect the empty cavity.
3.5 Save and transfer the calibration state
After obtaining a valid linear calibration:
- Save the calibration state in PicoVNA 3.
- Load the calibration state in PicoVNA 5.
- Save the calibration state in PicoVNA 5.
- Copy the calibration file path into the tomato settings file.
- Close PicoVNA 3 and PicoVNA 5.
3.6 Software operation using tomato
- Use the tomato package to start and control the experimental setup.
- Run 1-minute test measurement.
- Start catalyst measurement using payload.
3.7 Removing Catalyst
- Remove the reactor tube from cavity.
- Weigh and record the mass of the reactor tube with sample after the measurement.
- Remove the sample and the quartz wool together, and dispose of them in the red waste bin.
- Clean the reactor tube.
4. Shutdown
- Stop tomato by running
tomato stop. - Switch off the heater power.
- Close the compressed air valve (black).