🗄️ SOP: Gas Cabinet


- Call emergency services: 030 314 2 3333 or 112.
- Stay calm.
- Warn other people. If necessary, set off the fire alarm.
- The supervisor must be informed immediately.
- Note any events or near misses in the Lab Log.
1. Designation / Area of Application
- Routine work with the gas bottle cabinet
- Installation and removal of bottles from the gas bottle cabinet
- Safe work with carbon monoxide (CO) and ammonia (NH_3)
2. Dangers for Humans and Environment
- Life-threatening / Toxic / Harmful substances when inhaled
- Danger of asphyxiation due to lack of oxygen
- Danger of fire due to highly flammable gas
- Risk of injury due to gas escaping under high pressure
- Risk of to cold burns due to expanding gases
- Risk of explosions due to of heat or fire
- Risk of injury during mechanical work during transport and installation
3. Protective measures and rules


- Always use mobile gas sensors when working with CO or NH_3
- Storage of gas mixtures with CO or NH_3 content over 500 ppm is not allowed
- When changing bottles:
- An accompanying person must always be present outside the laboratory.
- Always open the window.
- Always check the valves of filled and empty gas bottles for leaks.
Operation of connected bottles
- Always assume that lines allocated to CO and NH_3 are pressurised with toxic gas:
- Never open the wingnut valve on the pressure reducer on the wall without an appropriate vent line attached.
- Do not disconnect any lines that may contain CO or NH_3 without purging them with purge gas for at least a minute first.
- After every use (at the end of an experiment):
- Close the gas bottle.
- Close the service gas inlet.
- Close the wingnut valve on the pressure reducer.
- Note the end of work in the Lab Log.
If you know that a certain gas bottle is not likely to be used soon (e.g. in the next month), follow the instructions for removal of bottles until point 13. Leave the bottle attached. Note the bottle status in the Lab Log.
If a bottle has not been used for a month (see Lab Log), proceed with installation of bottles from point 4. onwards. Note the bottle status in the Lab Log.
Removal of existing bottles
- Familiarise yourself with the
🧴 SOP: Gas Bottles. - Follow these steps:
- Close the wingnut valve on the pressure reducer on the wall.
- Close the gas bottle.
- Open the purge gas outlet. This will depressurise the line.
- Open the purge gas inlet. Let the purge gas clean the valve for a few seconds.
- Close the purge gas outlet.
- Attach the pressure reducer on the wall into a suitable vent.
- Open the pressure reducer on the wall, purging the line for a minute.
- Close the pressure reducer on the wall (both wingnut and pressure reducer).
- Close the service gas outlet.
- Close the purge gas inlet.
- Open and close the purge gas outlet to depressurise.
- Close the service gas inlet.
- Disconnect the bottle. Attach bottle cap. Remove the bottle.
Installation of new bottles
- Familiarise yourself with the
🧴 SOP: Gas Bottles. - Follow these steps:
- Do not open bottle until instructed to do so.
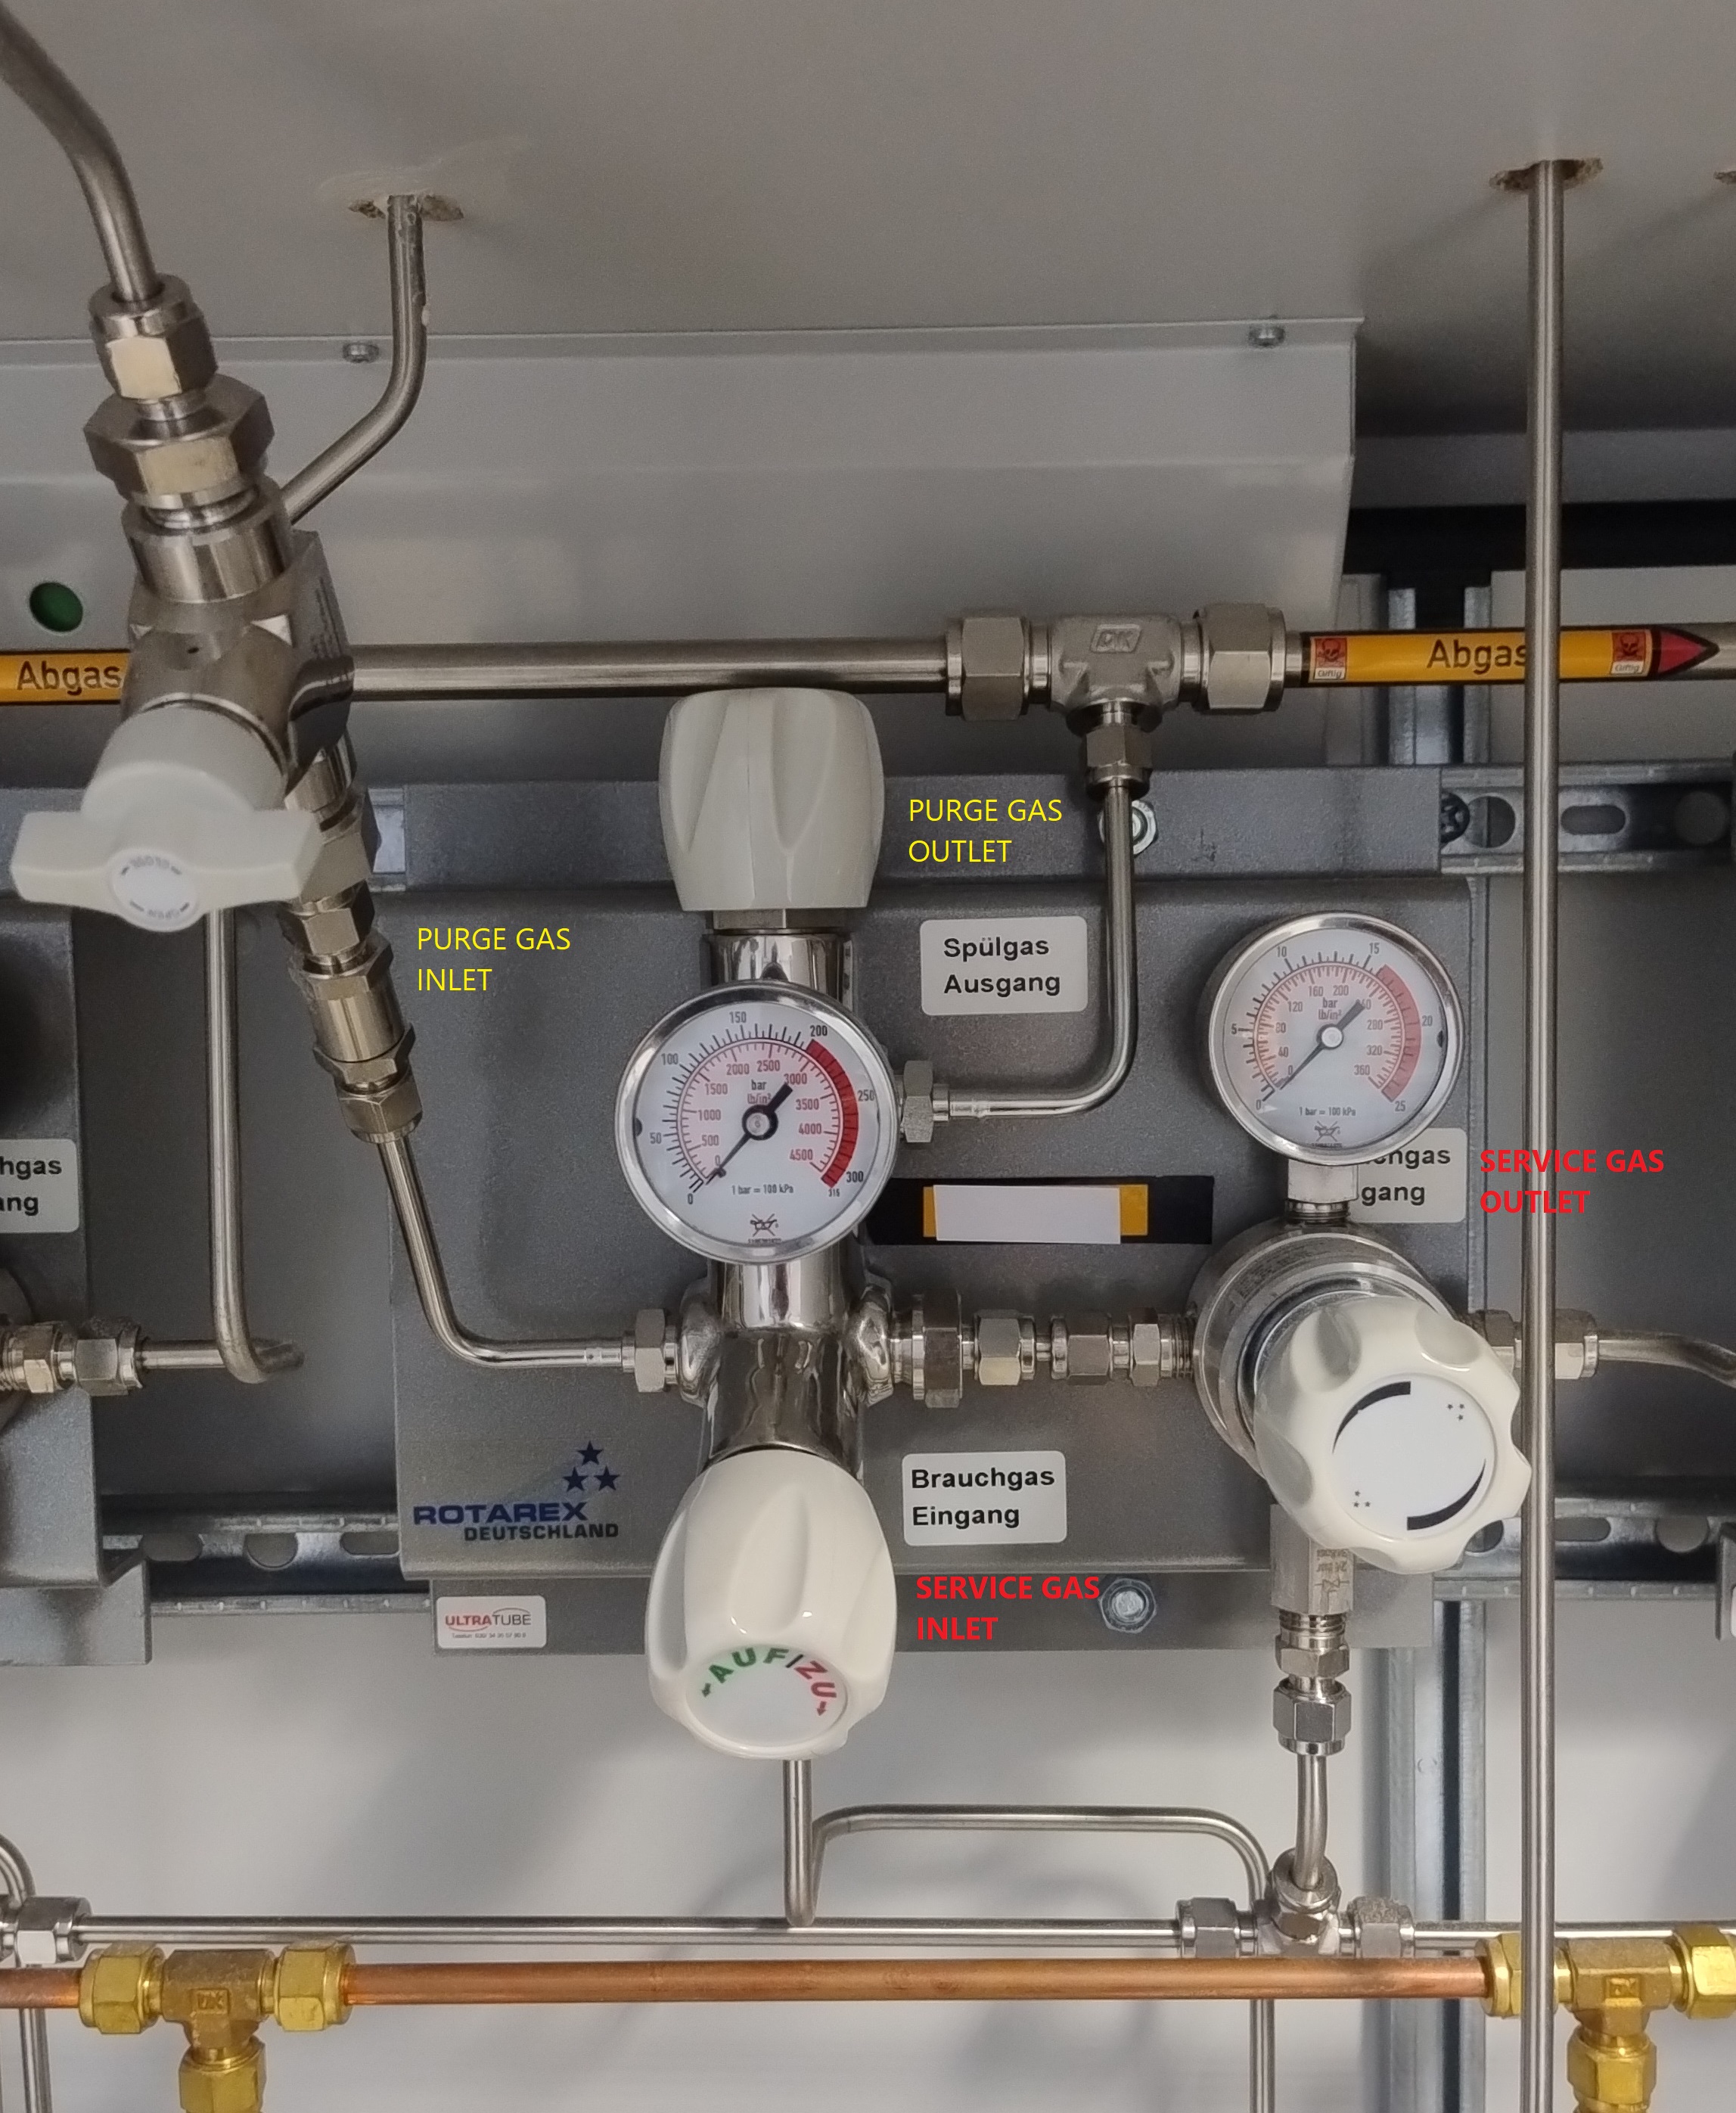
- Close all four valves in the gas cabinet (Figure 1).
- Close the wingnut valve on the pressure reducer on the wall.
- Vent the pressure reducer into a suitable vent.
- Insert and secure the bottle. Remove bottle cap and attach the line. Do not open bottle.
- Open purge gas inlet.
- Open service gas inlet. Do not open bottle.
- Set service gas outlet pressure to 5 - 6 bar.
- Open purge gas outlet for several seconds to purge the valve. Then close the purge gas outlet.
- If necessary, switch on the solenoids to allow the purge gas to reach the wall.
- Open the wingnut valve on the pressure reducer on the wall. Purge the line for a minute.
- Close the wingnut valve on the pressure reducer on the wall. Disconnect the vent line.
- Close the purge gas inlet.
- Open the bottle.
For installation of bottles with the same nominal composition, please make note of the act in the Lab Log. Ensure the new bottle is also present in the datalab inventory.
For installation of bottles with a new composition, follow the above instructions and also ensure correct labelling of pipes both inside as well as outside of the cabinet.
4. In the event of Danger
Refer to 🧴 SOP: Gas Bottles
5. First aid
Refer to 🧴 SOP: Gas Bottles